Candle making is a beautiful and crafty hobby that allows you to create personalized and unique candles for yourself or as gifts. One of the essential steps in candle making is melting and pouring the candle making wax. In this comprehensive guide, we will take you through the step-by-step techniques to master this process and create stunning candles every time.
Understanding the Basics of Candle Making Wax
Before diving into the melting and pouring process, it’s crucial to have a good understanding of the basics of candle making wax. Candle waxes come in various types, each with its characteristics and melting points. Let’s explore some common types of candle wax:
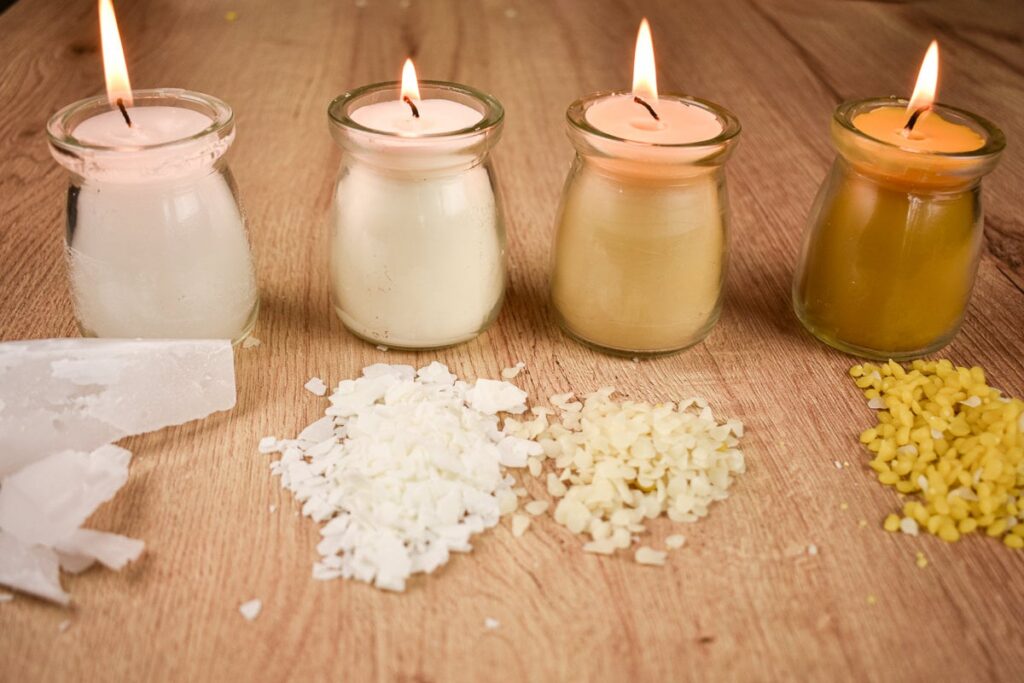
Types of Candle Wax
1. Paraffin Wax
This is the most popular type of candle wax, known for its affordability and easy availability. Paraffin wax comes in different melting points, making it suitable for various candle types.
2. Soy Wax
Made from soybean oil, soy wax is a natural alternative frequently chosen by eco-conscious candle makers. It has a lower melting point and provides a clean and even burn.
3. Beeswax
With its natural golden color and pleasant aroma, beeswax is a popular choice for high-quality candles. It has a higher melting point, making it ideal for creating sturdy and long-lasting candles.
4. Palm Wax
Derived from palm oil, palm wax is a renewable resource and produces unique crystal patterns when it cools. It has a higher melting point, making it suitable for larger or pillar candles.
The Role of Wax in Candle Making
Wax plays a crucial role in candle making, as it is responsible for holding the candle’s shape and facilitating its burn. The type of wax you choose will determine the appearance, scent, and burn time of your candles. It’s essential to select a wax that suits your specific candle making goals.
When it comes to paraffin wax, its versatility is a significant advantage. Its ability to blend easily with various additives, such as fragrance oils and dyes, allows candle makers to create an endless array of colors, scents, and designs. Whether you want to make vibrant, multi-colored candles or scented candles that fill the room with a delightful aroma, paraffin wax provides the perfect canvas for your creativity. Learn more how to maximize profit with candle wax wholesale opportunities.
Soy wax, on the other hand, has gained popularity due to its eco-friendly nature. It is a renewable resource, as soybeans are a sustainable crop. Choosing soy wax not only supports environmentally conscious practices but also ensures that you are using a natural product that is free from harmful chemicals. Additionally, soy wax has a lower melting point, which means it requires less heat to melt, making it easier and safer to work with.
Beeswax, with its rich history and natural appeal, is a favorite among candle enthusiasts. Its distinct golden color adds a touch of elegance to any candle, while its subtle, honey-like aroma creates a soothing atmosphere. Beeswax candles are known for their long burn times and minimal soot production, making them a popular choice for those seeking a clean and sustainable option.
Lastly, palm wax offers a unique aesthetic element to candle making. When palm wax cools, it forms beautiful crystal patterns on the surface of the candle, giving it a visually stunning appearance. This makes palm wax ideal for creating decorative pillar candles or statement pieces that can enhance the ambiance of any space. Moreover, using palm wax supports sustainable practices, as palm oil is derived from palm trees, which are a renewable resource.
As you can see, each type of candle wax brings its own set of advantages and characteristics to the table. Understanding these differences allows you to make informed decisions when selecting the wax that best suits your candle making needs. So, whether you’re aiming for affordability, eco-friendliness, elegance, or unique aesthetics, there’s a candle wax out there that will help you achieve your desired results.
Preparing Your Workspace for Wax Melting
Creating a suitable workspace is vital for a successful wax melting and pouring session. Here are some necessary steps to prepare your workspace:
Setting up your workspace for wax melting is not just about having the right tools and materials; it’s also about creating a conducive environment that promotes safety and efficiency. By taking a few extra precautions and adding some thoughtful touches, you can elevate your wax melting experience to a whole new level.
One key aspect to consider is the layout of your workspace. Make sure you have enough counter space to place all your tools within easy reach. Organizing your materials beforehand can save you time and prevent any last-minute scrambling during the melting process.

Safety Measures to Consider
Prioritize safety when working with hot wax. Ensure good ventilation in your workspace to prevent any buildup of fumes. It’s also crucial to have fire safety measures in place, such as a fire extinguisher and a fire-resistant work surface. Additionally, always wear protective gear, including heat-resistant gloves and safety goggles.
Another safety tip to keep in mind is to have a clear and uncluttered workspace. Avoid placing any flammable materials near your heat source and ensure there are no tripping hazards around. By maintaining a tidy workspace, you reduce the risk of accidents and can focus better on the task at hand.
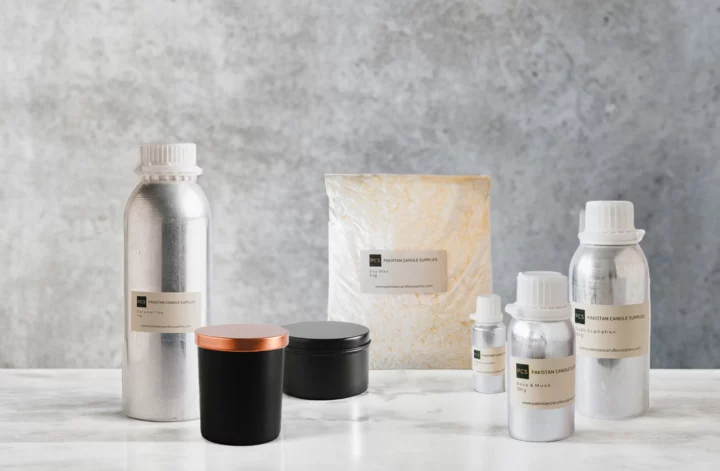
Necessary Tools for Wax Melting
Before you start melting wax, gather all the necessary tools. These may include a double boiler or a wax melting pitcher, a thermometer to monitor the wax temperature, a heat source such as a stove or a hot plate, and a heat-resistant stirring utensil. Investing in quality tools will make the process smoother and more enjoyable.
Consider adding a dedicated area in your workspace for cooling and setting the wax once it has been poured. Having a designated spot for this stage of the process can help you maintain organization and prevent any accidental disturbances to the cooling wax. Additionally, having a few extra molds or containers on hand can come in handy if you have excess melted wax that needs to be poured.
Detailed Guide to Melting Candle Wax
Now that you have your workspace prepared let’s dive into the step-by-step process of melting candle wax:
Before you begin melting your candle wax, it’s important to understand the different types of wax available. The most common types include paraffin wax, soy wax, and beeswax, each with its own melting point and characteristics. Choosing the right wax for your project can impact the scent throw, burn time, and overall quality of your candles.
Choosing the Right Heat Source
When melting wax, it’s crucial to choose a heat source that provides even and controlled heat. A double boiler is a preferred method, as it provides a gentle and indirect heat source. If you don’t have a double boiler, you can use a wax melting pitcher placed in a pot of water. Avoid direct heat sources, such as open flames, as they can overheat and potentially ignite the wax.
Another alternative heat source is a wax warmer, which uses a low-wattage light bulb to melt the wax slowly and evenly. This method is popular among candle makers for its convenience and safety.
Monitoring the Wax Temperature
As you melt your wax, it’s essential to monitor its temperature using a thermometer. Different waxes have different melting points, and overheating the wax can result in discoloration or even a fire hazard. Maintain the temperature within the recommended range for the specific wax you are using.
Additionally, adding fragrance oils or dyes to your melted wax can alter its melting point and viscosity. It’s important to follow the manufacturer’s guidelines for the amount and temperature at which these additives should be incorporated to achieve the desired results in your candles.
Techniques for Pouring Melted Wax
Now that your wax is beautifully melted let’s move on to the pouring techniques to create stunning candles:
Creating your own candles can be a rewarding and creative process. By mastering the art of pouring melted wax, you can produce unique and personalized candles that make perfect gifts or additions to your home decor. Let’s delve deeper into the intricacies of pouring wax to elevate your candle-making skills.
Achieving the Perfect Pour
When pouring your melted wax, it’s crucial to be mindful of some key factors. Start by ensuring your containers or molds are clean and dry. This step is essential to prevent any impurities from affecting the quality of your candles. Additionally, consider the type of wax you are using, as different waxes have varying melting points and pouring characteristics. Slowly and steadily pour the wax into the container, avoiding any sudden movements that may introduce air bubbles. The smooth and controlled pour will result in a flawless finish on your candles. Pay attention to the temperature of the wax, as pouring it too hot or too cold can lead to uneven setting or poor adhesion to the container walls.
Moreover, the ambiance in which you pour your candles can also impact the final outcome. Working in a draft-free area can help prevent rapid cooling or uneven solidification of the wax. Creating a serene and focused environment will enhance your candle-making experience and ensure the best results for your creations.

Troubleshooting Common Pouring Issues
Occasionally, you may encounter some pouring issues while working with melted wax. Here are some common problems and their solutions:
- If you notice wet spots forming on the surface of the candle after pouring, it may indicate poor adhesion. To prevent this, ensure the container is completely dry and warm before pouring, and avoid pouring wax that is too hot.
- In case air bubbles appear on the surface of the candle, lightly tap the container to release them. If the bubbles persist, you can use a heat gun or a hairdryer on the lowest setting to gently warm the surface and eliminate the bubbles. Remember, patience is key when dealing with air bubbles to maintain the aesthetic appeal of your candles.
- If your candle shows signs of cracking during or after the pouring process, it may be due to rapid cooling. Make sure to allow your candles to cool slowly and completely before moving them. Creating a gradual cooling process can help prevent cracks and ensure the structural integrity of your candles.
Cooling and Setting Your Candles
After pouring your wax, it’s time for the candles to cool and set. Proper cooling ensures a beautiful finish and maximizes the burn time of your candles. Here are some key points to consider:
Understanding the Cooling Process
Candles cool and solidify gradually. As they cool, they may develop a slight sinkhole in the center. To achieve a smooth surface, you can gently top up the wax by melting a small amount and pouring it into the sunken area. Allow your candles to cool completely before trimming the wicks and enjoying your creations.
Tips for Faster and Even Setting
If you want to speed up the cooling process, consider placing your candles in the refrigerator or a cool room. However, avoid cooling them too rapidly, as it may lead to cracking. Always aim for a balanced and gradual cooling process.
By following these step-by-step techniques for melting and pouring candle making wax, you’ll be able to create stunning candles that fill your space with warmth and tranquility. Enjoy the process, experiment with different waxes, and let your creativity shine through each unique candle you make.